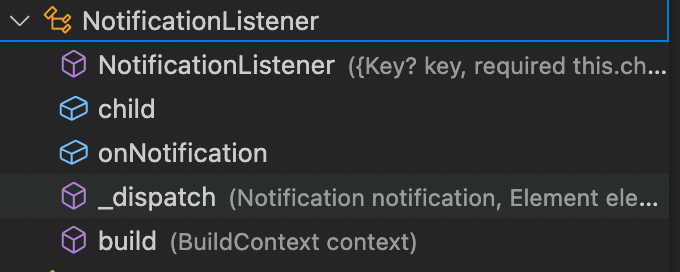
访问逻辑visitAncestor,并不知道是那个子类调用的dispatch方法,所以先查找widget is NotificationListener<Notification>,是的话就调用NotificationListener的_dispatch方法,并传入调用者,NotificationListener都知道自己监听的泛型类是什么,如果是调用者是自己监听的类,即调用onNotification回调。
1 2 3 4 5 6 7 8 9 10 11 12
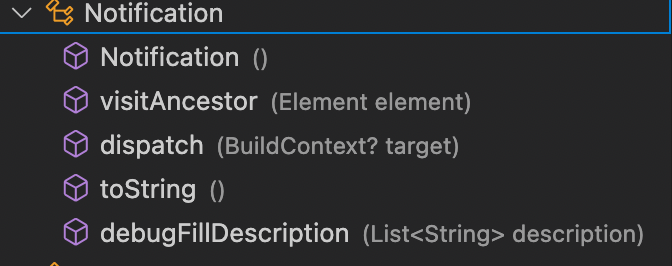
@protected @mustCallSuper bool visitAncestor(Element element) { if (element is StatelessElement) { final StatelessWidget widget = element.widget; if (widget is NotificationListener<Notification>) { if (widget._dispatch(this, element)) // that function checks the type dynamically return false; } } return true; }
Posted onEdited on Symbols count in article: 2.6kReading time ≈2 mins.
混编打包遇到环境不在有效范围内,爬坑记录
1 2 3 4 5 6 7 8
ERROR: Unknown FLUTTER_BUILD_MODE: distribution.
Valid values are 'Debug', 'Profile', or 'Release' (case insensitive).
This is controlled by the FLUTTER_BUILD_MODE environment variable.
If that is not set, the CONFIGURATION environment variable is used.

You can fix this by either adding an appropriately named build
configuration, or adding an appropriate value for FLUTTER_BUILD_MODE to the
.xcconfig file for the current build configuration (Distribution).
String parseFlutterBuildMode() {
  // Use FLUTTER_BUILD_MODE if it's set, otherwise use the Xcode build configuration name
  // This means that if someone wants to use an Xcode build config other than Debug/Profile/Release,
  // they _must_ set FLUTTER_BUILD_MODE so we know what type of artifact to build.
  final String? buildMode =
      (environment['FLUTTER_BUILD_MODE'] ?? environment['CONFIGURATION'])
          ?.toLowerCase();

  if (buildMode != null) {
  // 修改的地方
    if (buildMode.contains('release') || buildMode.contains('xxx')) {
      return 'release';
    }
    if (buildMode.contains('profile')) {
      return 'profile';
    }
    if (buildMode.contains('debug')) {
      return 'debug';
    }
  }
  echoError(
      '========================================================================');
  echoError('ERROR: Unknown FLUTTER_BUILD_MODE: $buildMode.');
  echoError(
      "Valid values are 'Debug', 'Profile', or 'Release' (case insensitive).");
  echoError(
      'This is controlled by the FLUTTER_BUILD_MODE environment variable.');
  echoError(
      'If that is not set, the CONFIGURATION environment variable is used.');
  echoError('');
  echoError('You can fix this by either adding an appropriately named build');
  echoError(
      'configuration, or adding an appropriate value for FLUTTER_BUILD_MODE to the');
  echoError(
      '.xcconfig file for the current build configuration (${environment['CONFIGURATION']}).');
  echoError(
      '========================================================================');
  exitApp(-1);
}
@override Widget build(BuildContext context) { return Scaffold( appBar: AppBar( title: const Text('Example'), ), body: Center( child: Column( mainAxisSize: MainAxisSize.min, mainAxisAlignment: MainAxisAlignment.center, children: const <Widget>[ Text('You have pushed the button this many times:'),
Extracted as a separate widget for performance optimization. As a separate widget, it will rebuild independently from [MyHomePage]. This is totally optional (and rarely needed). Similarly, we could also use [Consumer] or [Selector]. Count(), ], ), ), floatingActionButton: FloatingActionButton( key: const Key('increment_floatingActionButton'),
Calls `context.read` instead of `context.watch` so that it does not rebuild when [Counter] changes. onPressed: () => context.read<Counter>().increment(), tooltip: 'Increment', child: const Icon(Icons.add), ), ); } }